As a teenager, I was hooked on motor racing and became a frequent
visitor to Brands Hatch in Kent. This ignited my passion for taking
pictures, which I discovered I was good at. My first published pictures
were of a sequence showing a Formula Ford rolling into the barriers.
Quick reactions, a good panning technique and anticipation are skills I
honed beside the track. And it is those same skills I use today to
capture images of flying birds.
Taking a good shot of a bird in flight can seem daunting, and the smaller the bird the more difficult it becomes. Yet having some knowledge of bird behaviour goes a long way.
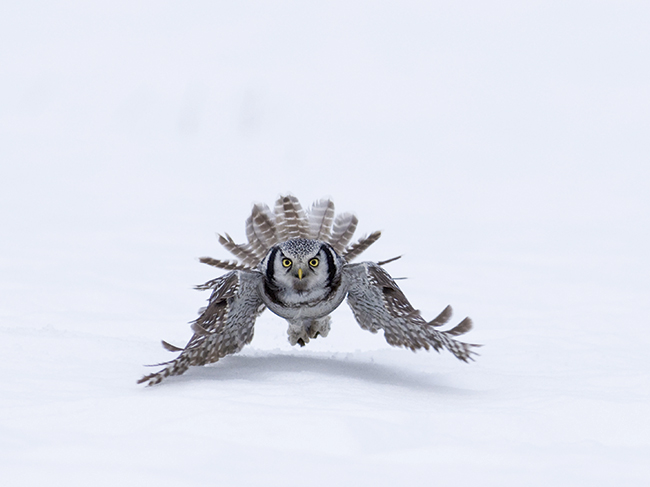
For example, ducks, geese and swans will send plenty of signals your way before they take flight. A shake or bob of the head is a signal to other birds in their group of impending departure – and a signal to you to get ready to capture take-off. Similarly, birds of prey will often defecate and ruffle their feathers before taking flight. These are just two examples of behaviour that, if you understand what you are seeing, will give you a head start.
Smaller birds can be attracted to a bird feeder or to water, and perches can be manipulated so flight photography is made easier.
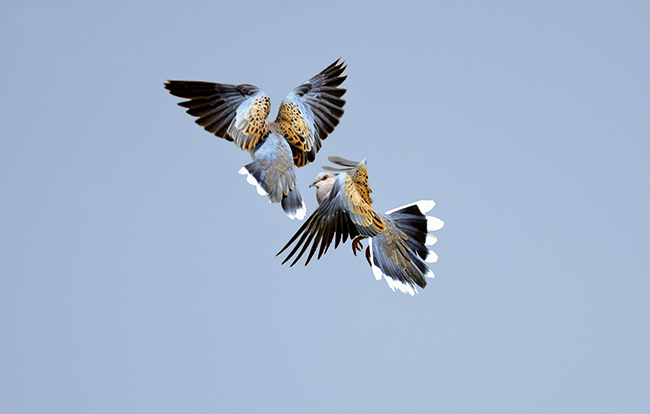
If food is put out regularly, then individual birds are likely to have favoured approaches to the perch, offering a chance to capture the action as they approach. A technique I use for taking shots of garden birds in flight requires hanging three or more feeders for a few days and then removing all but one of the feeders when I’m ready to photograph them. This can create a queuing system and the birds will squabble among themselves for food. It will also encourage birds to hover and slow up as they look for a spot to land.
Using food to encourage birds to fly can be taken a step further at your local park. Try throwing bread to birds that are used to people. Ducks can be fed on one side of a lake, and then be tempted to fly to the other side if you change position. Being inventive can go a long way to devising a shot.
By visiting a park or photographing in your garden, you don’t necessarily need a long telephoto lens for capturing great shots. There are plenty of other opportunities, too, where shorter lenses are likely to be better for more interesting images, such as starlings coming in to roost in winter. These birds create those wonderful murmurations in the sky, with hotspots including Brighton Pier in East Sussex, Aberystwyth Pier in Ceredigion, Gretna in Dumfries and Galloway, and the Somerset Levels.
In order to take great shots of birds in flight, you need a good autofocus capability. Lens choice is key here, as too short a focal length and you will struggle for image size, while too long and it becomes more difficult to track a fast-flying bird through the viewfinder. I tend to use a 300mm or 400mm lens for most of my flight shots, and being able to handhold is a great advantage over trying to shoot from a tripod. However, having said that, a heavier 600mm or 800mm lens will work well on a gimbal head, where smooth panning can be achieved.
You’ll want the camera to constantly update focus as you track your subject, so continuous AF is a given, but to ensure you maintain focus you need to keep the focus sensor on your subject as it moves. This is far easier when tracking a bird against a clear-blue sky than if your target is flying against hills or trees, as the more contrast there is between the subject and the background, the better the autofocus will work.
Some camera bodies allow you to activate clusters of sensors within the frame to help keep track of erratic flight. Different photographers use different techniques and you should experiment with your camera body’s capabilities. I tend to use one central focus sensor most of the time, but this is a personal preference, as is the use of the back-focus button, also known as rear focus.
Placement of your focusing sensor is crucial when photographing large birds in flight, as the aim is to have your subject’s eye sharp because this is the focal point in the picture to which a viewer’s eye is first drawn. It is easy to end up focusing on the end of the near wing, which may put the bird’s body in soft focus. To try to mitigate this, I use a large depth of field if I can with the light available.
For smaller birds, this is not so much of a problem unless they are filling the frame. Whatever depth of field you use, if you want sharp images, for birds larger than crows and ducks, you will be able to freeze wing movement with a shutter speed of 1/500sec or faster. For smaller birds, you will need 1/1000sec or more.
Finally, if your camera fires very rapidly, such as 10fps, and if you keep firing at a bird flying fast, you may not give your autofocus a chance to keep up. This is due to the autofocus sensors working at their optimum when the camera’s mirror is down. The faster the frame rate, the less time your autofocus has to keep up, so I suggest firing in short bursts while tracking your subject.
Taking a good shot of a bird in flight can seem daunting, and the smaller the bird the more difficult it becomes. Yet having some knowledge of bird behaviour goes a long way.
For example, ducks, geese and swans will send plenty of signals your way before they take flight. A shake or bob of the head is a signal to other birds in their group of impending departure – and a signal to you to get ready to capture take-off. Similarly, birds of prey will often defecate and ruffle their feathers before taking flight. These are just two examples of behaviour that, if you understand what you are seeing, will give you a head start.
Smaller birds can be attracted to a bird feeder or to water, and perches can be manipulated so flight photography is made easier.
If food is put out regularly, then individual birds are likely to have favoured approaches to the perch, offering a chance to capture the action as they approach. A technique I use for taking shots of garden birds in flight requires hanging three or more feeders for a few days and then removing all but one of the feeders when I’m ready to photograph them. This can create a queuing system and the birds will squabble among themselves for food. It will also encourage birds to hover and slow up as they look for a spot to land.
Using food to encourage birds to fly can be taken a step further at your local park. Try throwing bread to birds that are used to people. Ducks can be fed on one side of a lake, and then be tempted to fly to the other side if you change position. Being inventive can go a long way to devising a shot.
By visiting a park or photographing in your garden, you don’t necessarily need a long telephoto lens for capturing great shots. There are plenty of other opportunities, too, where shorter lenses are likely to be better for more interesting images, such as starlings coming in to roost in winter. These birds create those wonderful murmurations in the sky, with hotspots including Brighton Pier in East Sussex, Aberystwyth Pier in Ceredigion, Gretna in Dumfries and Galloway, and the Somerset Levels.
In order to take great shots of birds in flight, you need a good autofocus capability. Lens choice is key here, as too short a focal length and you will struggle for image size, while too long and it becomes more difficult to track a fast-flying bird through the viewfinder. I tend to use a 300mm or 400mm lens for most of my flight shots, and being able to handhold is a great advantage over trying to shoot from a tripod. However, having said that, a heavier 600mm or 800mm lens will work well on a gimbal head, where smooth panning can be achieved.
Focusing
The intricacies of focus-point selection, along with the pros and cons of using the back-focus button, are much discussed among bird photographers. However, there are some basic tips that will increase your success rate.You’ll want the camera to constantly update focus as you track your subject, so continuous AF is a given, but to ensure you maintain focus you need to keep the focus sensor on your subject as it moves. This is far easier when tracking a bird against a clear-blue sky than if your target is flying against hills or trees, as the more contrast there is between the subject and the background, the better the autofocus will work.
Some camera bodies allow you to activate clusters of sensors within the frame to help keep track of erratic flight. Different photographers use different techniques and you should experiment with your camera body’s capabilities. I tend to use one central focus sensor most of the time, but this is a personal preference, as is the use of the back-focus button, also known as rear focus.
Placement of your focusing sensor is crucial when photographing large birds in flight, as the aim is to have your subject’s eye sharp because this is the focal point in the picture to which a viewer’s eye is first drawn. It is easy to end up focusing on the end of the near wing, which may put the bird’s body in soft focus. To try to mitigate this, I use a large depth of field if I can with the light available.
For smaller birds, this is not so much of a problem unless they are filling the frame. Whatever depth of field you use, if you want sharp images, for birds larger than crows and ducks, you will be able to freeze wing movement with a shutter speed of 1/500sec or faster. For smaller birds, you will need 1/1000sec or more.
Finally, if your camera fires very rapidly, such as 10fps, and if you keep firing at a bird flying fast, you may not give your autofocus a chance to keep up. This is due to the autofocus sensors working at their optimum when the camera’s mirror is down. The faster the frame rate, the less time your autofocus has to keep up, so I suggest firing in short bursts while tracking your subject.


Post a Comment